
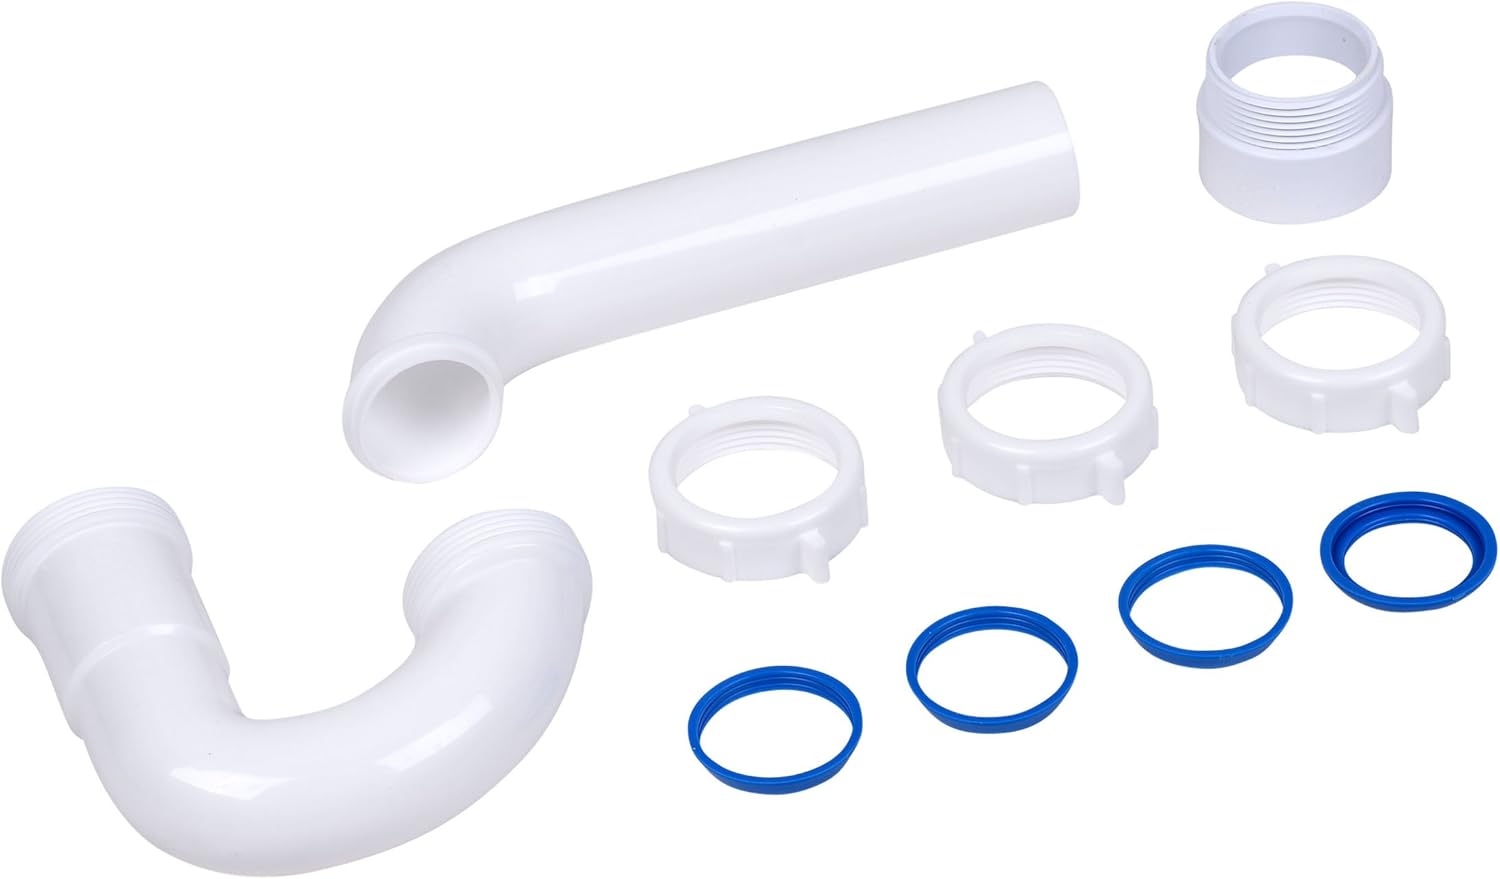
The persistent drip, the unsightly puddle, the growing concern under your bathroom sink – a leaking P-trap is a common household nuisance, but one that can quickly escalate from minor annoyance to significant water damage if left unaddressed. As an industry authority in construction trades and a seasoned DIY guide, I’m here to tell you that tackling a leaking P-trap under a bathroom sink is well within the capabilities of most homeowners. This comprehensive guide will equip you with the knowledge, tools, and step-by-step instructions needed to confidently diagnose, repair, and prevent future leaks, transforming you from a frustrated homeowner into a capable plumbing hero. Let’s get that drip stopped for good!
Tools, Materials, and Parts You’ll Need
Before diving under the sink, it’s crucial to gather everything you’ll require. Having these items on hand will make the job smoother and prevent frustrating mid-project trips to the hardware store. Consider this your essential plumbing toolkit for fixing a leaking P-trap under a bathroom sink.
Essential Tools:
-
- Bucket or Small Pan: To catch residual water from the P-trap.
-
- Adjustable Wrench or Slip-Joint Pliers: For loosening and tightening slip nuts.
-
- Flashlight or Headlamp: For better visibility under the sink cabinet.
-
- Rags or Towels: For cleanup and absorbing spills.
-
- Wire Brush (Optional): For cleaning threads if necessary.
-
- Utility Knife or PVC Cutter (for PVC systems): If cutting new pipe sections.
-
- Screwdriver (Phillips or Flathead): For removing cabinet doors if they obstruct access.
As an individual I’ve been in the construction trades for 30 years and 14 of them as a self employed business owner. The tools and parts I suggest are things I’ve used everyday to do my work. I realize not everyone is going to spend top dollar on products. But as the old saying goes you “Get What You Pay For”. . . ESSENTIAL TOOLS For Under Sink Drain Repairs
Materials and Parts:
-
- Replacement Washers/Gaskets: Often the culprit. Ensure you get the correct size and type (e.g., slip-joint washers, flange washers). It’s wise to have a small assortment.
-
- plumber‘s Tape (PTFE Tape): For threaded connections (though less common on standard P-trap slip joints, it can be useful on other drain connections).
-
- Plumber’s Putty (Optional): For sealing around the drain flange if that’s also leaking.
-
- New P-trap Assembly (Complete or Individual Components): If the trap itself is cracked, corroded, or if components are stripped. This could be PVC, ABS, or chrome-plated brass.
-
- Pipe Thread Sealant (Dope – for metal traps): For ensuring a watertight seal on threaded metal pipes.
-
- Gloves: To keep your hands clean and protected.
-
- Safety Glasses: Always a good idea when working with tools and potential splashes. WARNING! Do not take this lightly. You’re working with liquid so making sure you use a PPE that is rated for liquids. Our list below includes such a PPE and this is the style we use when working with liquids and fine dust particles. Diseases and infections can enter the eyes as easily as the mouth and nose.
You can view the list of items here. . . you may not need all these items so select the items that fit your situation. HANDYMAN SERVICES PARTS LIST
Pro Tip: When purchasing replacement parts, consider taking photos of your existing P-trap and its connections, or even bringing a removed washer to the hardware store to ensure you get the exact match. P-trap sizes are typically 1 1/4 inch or 1 1/2 inch for bathroom sinks.
Understanding Your P-trap: Anatomy and Common Leak Points
Before you can effectively stop a leak, it helps to understand what you’re working with. The P-trap is the U-shaped or S-shaped pipe section directly beneath your sink drain. It serves two primary functions:
-
- Water Seal: It holds a small amount of water, creating a barrier that prevents noxious sewer gases from entering your home.
-
- Debris Trap: It catches heavier items like rings, hair, and other debris before they can travel further down the drain and cause blockages in your main plumbing lines.
Understanding these functions helps explain why certain parts are more prone to leaking.
Where Do P-traps Typically Leak?
Most leaks aren’t from the pipe itself (unless it’s cracked or corroded), but rather from the connections and seals. Here are the common culprits:
-
- Slip Nuts and Washers: These are the most frequent source of leaks. The P-trap assembly is usually held together by several slip nuts, which compress rubber or plastic washers against the pipe joints to create a watertight seal. Over time, these washers can harden, crack, or become dislodged, leading to drips. The nuts themselves can loosen from vibrations or simply not be tightened enough.
-
- Threaded Connections: While less common on the main P-trap body itself (which often uses slip joints), other parts of your drain assembly might have threaded connections. If these aren’t sealed properly with plumber’s tape or dope, they can leak.
-
- The Trap Body Itself: Less common, but possible, is a crack in the plastic (PVC/ABS) or corrosion in metal (brass) P-trap body. This usually requires a full replacement of the P-trap.
-
- Drain Flange/Basket Strainer: The seal between the drain assembly in the sink basin and the top of the P-trap can also fail. This often involves plumber’s putty or a gasket under the sink that has deteriorated. While not strictly a P-trap leak, it’s often mistaken for one due to its proximity.
Key Takeaway: Most P-trap leaks are due to faulty washers or loose slip nuts. Focus your initial inspection and repair efforts there.
Safety First: Preparing Your Workspace for P-trap Repair
Working under a sink can be cramped and wet. Proper preparation isn’t just about efficiency; it’s about safety and minimizing mess. This step is crucial for fixing a leaking P-trap under a bathroom sink effectively.
-
- Clear the Cabinet: Remove all items from under the sink. This provides clear access and protects your belongings from water.
-
- Turn Off the Water Supply: While not strictly necessary for P-trap work (as it’s on the drain side), it’s a good habit to turn off the hot and cold water shut-off valves for the sink if you’re uncomfortable or if there’s any chance you might accidentally disturb the supply lines. These valves are usually located on the wall directly beneath the sink.
-
- Position Your Bucket and Towels: Place a bucket or a small pan directly under the P-trap. Lay down several rags or old towels to catch any spilled water and to protect your cabinet base.
-
- Illuminate Your Workspace: Use a flashlight or headlamp. Good visibility is essential for identifying leak sources and working confidently in tight spaces.
-
- Wear Protective Gear: Put on your safety glasses and gloves.
“An ounce of prevention is worth a pound of wet cleanup.” Always prepare your area thoroughly before disconnecting any plumbing components.
The Step-by-Step Guide to Fixing a Leaking P-trap Under a Bathroom Sink
Now that you’re prepared, let’s get hands-on. This detailed process will walk you through diagnosing and repairing your leaky P-trap.
Step 1: Drain the Old Trap
Before loosening anything, you need to empty the water currently held within the P-trap. This is where your bucket comes in.
-
- Place your bucket directly under the P-trap.
-
- Locate the lowest slip nut on the P-trap (usually where it connects to the horizontal arm going into the wall).
-
- Using your adjustable wrench or slip-joint pliers, carefully loosen this slip nut. A small amount of water will start to drip out. Allow it to drain completely into the bucket.
-
- Once the water flow stops, you can proceed to fully disconnect the trap.
Step 2: Disconnecting the P-trap
With the trap drained, you can now remove it for inspection and repair.
-
- Loosen All Slip Nuts: There are typically two or three slip nuts holding the P-trap in place:
-
- One connecting to the tailpiece (the pipe coming straight down from the sink drain).
-
- One connecting the U-bend to the horizontal arm that goes into the wall.
-
- Sometimes, another connecting a clean-out plug on the bottom of the U-bend (if present).
Turn these nuts counter-clockwise to loosen them.
-
- Loosen All Slip Nuts: There are typically two or three slip nuts holding the P-trap in place:
-
- Carefully Remove the Trap: Once all nuts are loose, gently pull the P-trap assembly free. Be mindful of any remaining drips.
-
- Inspect the Removed Trap: Take the trap out from under the sink. This is a good opportunity to check for any clogs or debris inside the U-bend itself. Clean it out if necessary.
Step 3: Inspecting for Damage and Identifying the Leak Source
With the P-trap removed, you can now thoroughly inspect its components. This is the critical diagnostic phase for fixing a leaking P-trap under a bathroom sink.
-
- Examine Washers/Gaskets: These are the most common culprits. Look for signs of wear, cracking, hardening, or deformation. Also, check if they are seated correctly. If they look compromised, replacement is your first step.
-
- Check Slip Nuts and Threads: Ensure the slip nuts aren’t cross-threaded or stripped. The threads on the pipe sections should also be intact.
-
- Inspect the Trap Body: Look for any visible cracks, especially in plastic traps, or significant corrosion/pitting in metal traps. If you find a crack, the entire P-trap assembly will need to be replaced.
-
- Inspect Tailpiece and Wall Drain Pipe: While the P-trap is out, quickly check the pipes it connects to for any damage or debris.
Step 4: Repairing vs. Replacing Components
Based on your inspection, you’ll either repair specific parts or replace the entire assembly.
Option A: Replacing Worn Washers/Gaskets (Most Common Fix)
If the washers are the issue, this is a straightforward repair:
-
- Remove Old Washers: Take off the old, damaged washers from the pipe ends and inside the slip nuts.
-
- Clean Threads and Pipe Ends: Use a rag to clean any debris or grime from the pipe threads and the pipe ends where the washers seat. A wire brush can help if there’s significant buildup.
-
- Install New Washers: Slide the new, correctly sized washers onto the pipe ends. Ensure they are seated properly and facing the correct direction (usually a tapered side towards the nut).
Option B: Tightening Loose Connections
If the washers seem fine and the nuts were simply loose:
-
- Ensure washers are correctly seated.
-
- Proceed directly to reassembly and tighten the nuts firmly.
Option C: Replacing the Entire P-trap Assembly
If the trap body is cracked, severely corroded, or if multiple components are damaged beyond simple washer replacement, it’s best to replace the entire P-trap. Most P-trap kits come with all necessary washers and nuts.
-
- Purchase a new P-trap assembly (PVC, ABS, or brass) of the correct size (1 1/4″ or 1 1/2″).
-
- Assemble the new P-trap according to the manufacturer’s instructions, ensuring all new washers are properly seated.
Step 5: Reassembling the P-trap
Carefully put everything back together.
-
- Position the P-trap: Carefully align the P-trap with the tailpiece from the sink and the drain pipe coming from the wall.
-
- Hand-Tighten Slip Nuts: Start by hand-tightening all slip nuts. This helps prevent cross-threading. Ensure the washers remain correctly seated as you tighten.
-
- Final Tightening: Once hand-tight, use your adjustable wrench or slip-joint pliers to gently tighten each slip nut.
-
- Do NOT overtighten! Overtightening can crack plastic nuts or pipes, and compress washers excessively, leading to future leaks.
-
- Tighten until snug, then give it an additional 1/4 to 1/2 turn. The goal is firm but not brute-force tight. You should feel resistance but not be straining.
-
- Final Tightening: Once hand-tight, use your adjustable wrench or slip-joint pliers to gently tighten each slip nut.
Step 6: Testing for Leaks
The moment of truth! This step is crucial to confirm your fixing a leaking P-trap under a bathroom sink was successful.
-
- Turn Water On: If you turned off the main water supply, turn it back on.
-
- Run Water: Turn on the sink faucet to a moderate flow (both hot and cold) and let the water run for a minute or two. Fill the sink about halfway, then pull the stopper and let all the water drain.
-
- Inspect Carefully: With your flashlight, meticulously inspect all connections on the P-trap. Feel for any moisture with a dry paper towel or your fingers. Pay close attention to the areas where the old leaks were, and also check any new connections you made.
-
- Address Any Drips: If you see a small drip, try giving the corresponding slip nut another slight turn (no more than 1/8 to 1/4 turn). If the leak persists, you may need to disassemble, re-inspect the washer for proper seating, and reassemble. It’s rare, but sometimes a washer can get pinched or twisted during tightening.
Troubleshooting Common P-trap Leaks (and How to Prevent Them)
Even with careful work, sometimes a leak can persist or reappear. Here’s how to troubleshoot and prevent future issues.
Persistent Drips After Repair:
-
- Washer Misalignment: The most common reason. Disassemble the leaking joint, ensure the washer is perfectly centered and flat, and then reassemble and tighten. Sometimes applying a tiny bit of plumber’s grease to a rubber washer can help it slide into place without binding.
-
- Overtightening/Undertightening: If you overtightened, you might have cracked a plastic nut or pipe, or deformed a washer. If undertightened, the seal isn’t compressed enough. Experiment with slight adjustments.
-
- Wrong Size Washer: Even a slight difference in washer size can prevent a proper seal. Double-check your replacement parts.
-
- Damaged Threads: If the plastic threads on the pipe or nut are stripped or cross-threaded, they won’t hold tight. This will require replacing the damaged component.
-
- Hairline Crack: If you’ve replaced washers and tightened correctly and the leak persists, there might be a subtle hairline crack in the P-trap body itself that you missed. A full P-trap replacement would be necessary.
Preventing Future Leaks:
-
- Regular Visual Inspection: Periodically peek under your sink. Look for any signs of moisture, rust stains, or discoloration. Early detection can prevent major problems.
-
- Avoid Harsh Drain Cleaners: Chemical drain cleaners can sometimes corrode older metal P-traps or weaken plastic over time. Opt for enzymatic cleaners or a plumber’s snake for clogs.
-
- Don’t Overtighten: When performing any plumbing work, remember the lesson of the previous section. Snug is good; straining is bad.
-
- Proper Waste Disposal: Try to avoid letting large amounts of hair, grease, or food particles go down the drain, as these can lead to clogs that put stress on the P-trap.
When to Call a Professional (and How to Maintain Your P-trap)
While fixing a leaking P-trap under a bathroom sink is a highly manageable DIY project, there are situations where calling in a professional plumber is the wisest course of action.
When to Call a Pro:
-
- Seized or Corroded Pipes: If the slip nuts are so rusted or seized that you cannot loosen them without risk of damaging surrounding pipes.
-
- Beyond the P-trap: If the leak source is determined to be further down the drain line, within the wall, or involves structural piping.
-
- Persistent Leaks: If you’ve tried multiple times to fix the leak, replaced components, and it still persists. A plumber has specialized tools and experience to diagnose more complex issues.
-
- Lack of Confidence: If you feel uncomfortable or out of your depth at any point during the repair, it’s always better to call a professional than to risk creating a bigger problem.
-
- Complex Drain Issues: If your P-trap leak is accompanied by slow drains throughout the house or gurgling sounds, it might indicate a larger plumbing system problem.
Maintaining Your P-trap for Longevity:
Preventative maintenance can significantly extend the life of your P-trap and prevent future leaks.
-
- Annual Inspection: Once a year, take a few minutes to visually inspect your P-trap and all under-sink plumbing connections. Check for any signs of corrosion, loose nuts, or dampness.
-
- Gentle Cleaning: If you have a slow drain, try pouring a mixture of baking soda and vinegar down the drain, followed by hot water. This can often clear minor clogs without harsh chemicals.
-
- Avoid Excessive Weight: Don’t store extremely heavy items directly on or pressing against the P-trap or drain pipes, as this can stress connections.
-
- Know Your Materials: If you have an older metal P-trap, be aware that it’s more susceptible to corrosion than modern PVC or ABS traps. Consider replacing it with a plastic trap if it shows signs of significant wear.
Conclusion
Stopping a leaking P-trap under your bathroom sink is more than just a repair; it’s an empowering act of homeownership. By understanding the anatomy of your P-trap, gathering the right tools, and following these detailed steps, you’ve not only fixed a troublesome leak but also gained valuable plumbing experience and confidence. You’ve saved money, prevented potential water damage, and ensured your bathroom remains a functional, pleasant space.
Take pride in your newly acquired skill and the quiet, leak-free plumbing you’ve achieved. Remember, many common household plumbing issues are entirely manageable with a little knowledge and effort. Keep this guide handy, and the next time a drip dares to appear, you’ll be ready. Enjoy your dry cabinet!
FAQs: Frequently Asked Questions About Leaking P-traps
Q1: Why does my P-trap keep leaking even after I’ve tightened it?
A1: If tightening doesn’t solve the leak, the most likely culprits are worn, cracked, or improperly seated washers (gaskets). They might be old and hardened, or they could have shifted during tightening. Less commonly, there could be a hairline crack in the P-trap body itself or stripped threads on the slip nuts or pipes. Disassemble, carefully inspect all washers and threads, replace any suspect parts, and reassemble ensuring the washers are perfectly flat and centered.
Q2: Can I use plumber’s tape on a plastic P-trap’s slip-joint connections?
A2: While plumber’s tape (PTFE tape) is excellent for threaded metal pipe connections, it’s generally not recommended or necessary for the slip-joint connections found on most plastic P-traps. These joints rely on the compression of a rubber or plastic washer to create a seal. Using tape might interfere with the proper seating of the washer and could even make the leak worse. However, if you have a threaded connection somewhere else in the drain line (e.g., a clean-out plug), tape would be appropriate there.
Q3: What’s the difference between PVC and ABS P-traps? Can I mix them?
A3: PVC (Polyvinyl Chloride) and ABS (Acrylonitrile Butadiene Styrene) are both common types of plastic drain pipes. PVC is typically white, while ABS is black. While they serve similar functions, they are made of different plastics and require different types of cement for permanent connections. For slip-joint P-traps, where connections are made with nuts and washers rather than solvent cement, they can often be used interchangeably in terms of connecting to existing PVC or ABS drain lines, provided the diameter is correct. However, always check local plumbing codes, as some regions have preferences or restrictions.
Q4: My P-trap leaks only when the sink is full and draining quickly. What could cause that?
A4: This often indicates a small, intermittent leak that only becomes apparent under higher water pressure or volume. It’s usually a sign that a washer is slightly worn, misaligned, or a slip nut isn’t quite tight enough. The increased flow and weight of the water exiting the sink are enough to exploit the weak point in the seal. Follow the diagnostic steps to inspect all connections and washers thoroughly, paying extra attention to the seal between the sink’s tailpiece and the top of the P-trap.
Q5: Is it better to repair or replace an old P-trap?
A5: If the leak is clearly due to a worn washer or a loose nut, a simple repair is usually sufficient and cost-effective. However, if the P-trap itself shows signs of significant corrosion (for metal traps), cracking (for plastic traps), or if multiple components are stripped/damaged, a full replacement is often the better long-term solution. Modern plastic P-traps are relatively inexpensive and easier to work with than older metal ones. If your trap is very old and frequently clogs, replacement might also be a good idea for improved flow and peace of mind.
