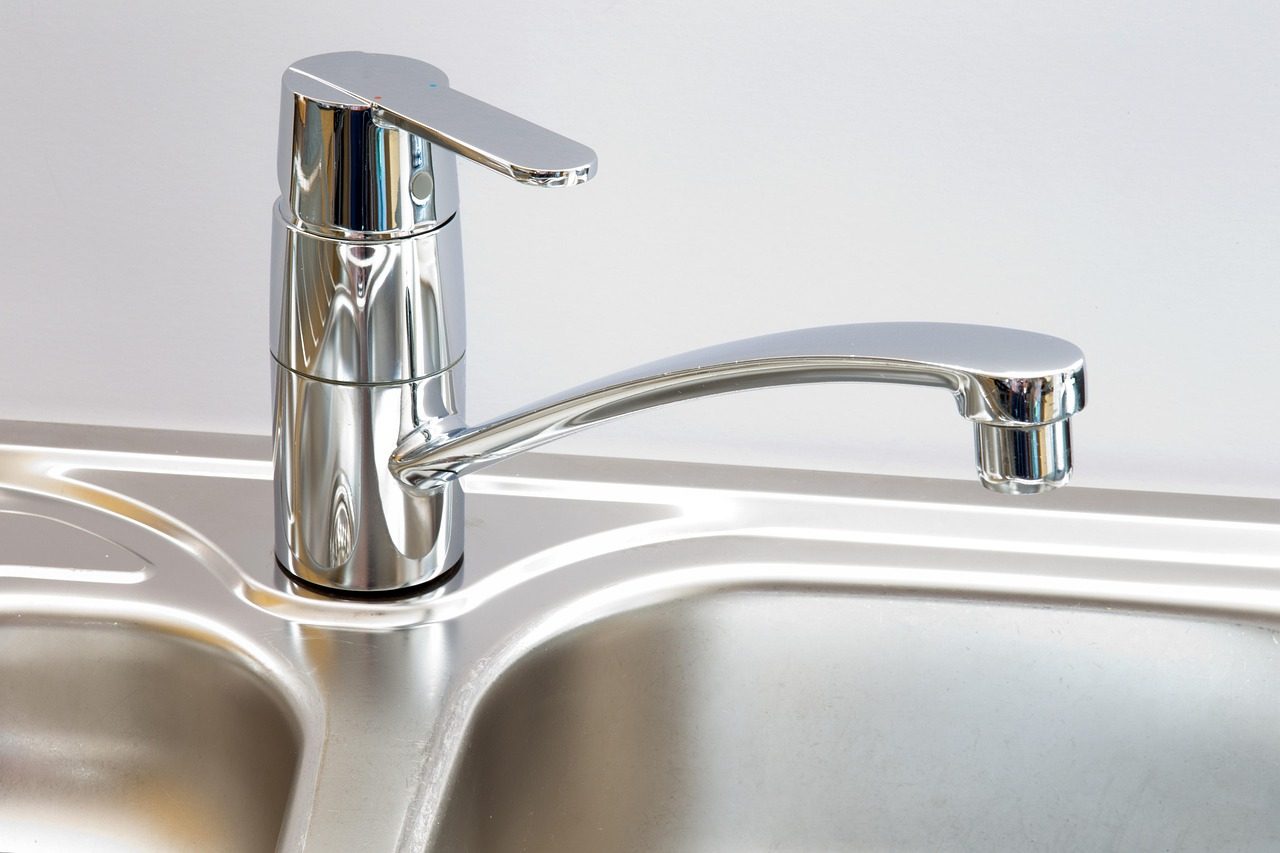
A persistent drip from your kitchen faucet isn’t just an annoyance; it’s a silent drain on your wallet and a stark reminder of wasted resources. Every minute, hour, and day that drip continues, precious water is lost, increasing your utility bills and potentially contributing to mildew growth in your sink area. But before you call a costly plumber, understand that repairing a dripping kitchen faucet is one of the most common and manageable DIY home improvement tasks you can undertake. With a little guidance, the right tools, and a bit of patience, you can tackle this seemingly daunting challenge yourself, saving money and gaining a profound sense of accomplishment.
Did you know a single dripping faucet can waste over 3,000 gallons of water per year? That’s enough to take 180 showers!
This authoritative guide will walk you through everything you need to know, from identifying your faucet type to executing the precise repair, ensuring your kitchen faucet returns to leak-free operation. We’ll provide practical, actionable advice, demystifying the process and empowering you to become your own plumbing expert.
The Essential Toolkit & Parts List for faucet repair
Before you begin any plumbing work, gathering the necessary tools and potential replacement parts is crucial. Having everything at hand will prevent frustrating interruptions and ensure a smoother repair process.
General Tools You’ll Need
-
- Adjustable Wrench: Indispensable for loosening and tightening nuts.
-
- Phillips and Flathead Screwdrivers: For removing handle screws and other fasteners.
-
- Hex Keys (Allen Wrenches): Many modern faucets use these for handle set screws.
-
- Pliers (Channel Locks or Tongue-and-Groove): For gripping and turning.
-
- Utility Knife or Small Flathead Screwdriver: For prying off decorative caps.
-
- Flashlight or Headlamp: For illuminating dark spaces under the sink.
-
- Rag or Towel: For wiping up water and protecting surfaces.
-
- Bucket or Small Container: To catch any residual water.
-
- Pipe Wrench (Optional but useful): For stubborn nuts on supply lines.
-
- Nylon Scrubber/Old Toothbrush: For cleaning mineral deposits.
-
- Masking Tape or Plumber’s Tape (PTFE Tape): For protecting finishes and sealing threads.
-
- Silicone Grease (Plumber’s Grease): Essential for lubricating O-rings and seals.
Common Replacement Parts to Have on Hand
While the exact parts depend on your faucet type, having these generic items can often expedite a repair:
-
- Assorted O-rings: Different sizes are used in many faucet types.
-
- Washer Assortment: Especially for compression faucets.
-
- New Cartridge: If you know your faucet uses one, having a spare can save a trip. Note that cartridges are often specific to brand/model.
-
- Ceramic Discs: For ceramic disc faucets, if they are damaged or heavily mineralized.
-
- Replacement Springs and Seals: Primarily for ball faucets.
-
- Faucet Seat Wrench: If your faucet has replaceable seats.
Pro Tip: Take a picture of your faucet’s make and model (often found on the underside or back) before heading to the hardware store. Better yet, remove the problematic part and take it with you to ensure a perfect match.
Before You Begin: Critical Preparation Steps for Faucet Repair
Proper preparation is key to a successful, stress-free repair. Don’t skip these crucial initial steps.
Identifying Your Faucet Type
Understanding the type of faucet you have is paramount, as the internal mechanisms and repair processes vary significantly. There are four main types of kitchen faucets:
-
- Compression Faucets: These are older, often two-handle designs (hot and cold). They drip because the rubber washers that seal against a valve seat wear out.
-
- Cartridge Faucets: Found in both single and double-handle designs, these use a plastic or metal cartridge that moves up and down or rotates to control water flow. Leaks usually mean replacing the entire cartridge.
-
- Ceramic Disc Faucets: Often single-handle, these feature two ceramic discs that slide against each other. They are very durable but can leak if the discs become scratched, cracked, or if the seals around the disc assembly fail.
-
- Ball Faucets: Exclusively single-handle, these are characterized by a rotating ball joint that controls water flow. They have several seals and O-rings that can wear out.
If you’re unsure, consulting your faucet’s manual or searching online using the brand and model number (usually found stamped on the faucet body or under the sink) can help you identify it.
Shutting Off the Water Supply
This is arguably the most critical step. Failure to do so will result in a flood!
-
- Locate the Shut-Off Valves: Look under your kitchen sink. You should find two small valves (one for hot, one for cold) connected to the water lines leading to your faucet.
-
- Turn Them Off: Rotate the handles clockwise until they are snug. Do not overtighten, as this can damage the valves.
-
- Test the Faucet: Turn on both the hot and cold handles of your kitchen faucet to ensure the water supply is completely off. Let any residual water drain out.
In some older homes, you might not have individual shut-off valves under the sink. In this case, you’ll need to turn off the main water supply to your house, usually located near the water meter or where the main water line enters your home.
Clearing the Workspace & Protecting Your Sink
-
- Remove everything from under the sink and around the sink basin to give yourself ample room to work.
-
- Place a towel or rag in the sink basin to protect it from dropped tools or parts.
-
- Keep your bucket handy to catch any water that might spill during disassembly.
Deep Dive: Step-by-Step Guide to Repairing a Dripping Kitchen Faucet by Type
Now that you’re prepared, let’s get into the specifics of repairing a dripping kitchen faucet based on its type.
Compression Faucets: The Classic Drip Fix
Often the simplest to fix, the drip typically comes from worn-out rubber washers inside the handle assembly.
-
- Remove the Handle: Pry off the decorative cap (if present) with a utility knife or small flathead screwdriver. Unscrew the handle screw(s) with a Phillips or flathead screwdriver and lift off the handle.
-
- Remove the Packing Nut & Stem: Use your adjustable wrench to loosen and remove the packing nut. Carefully lift the faucet stem out of the faucet body.
-
- Inspect and Replace Washers: On the bottom of the stem, you’ll find a rubber washer held in place by a screw. Remove the screw and the old washer. Also, inspect the O-rings or packing washer around the stem itself; replace if worn.
-
- Clean and Reassemble: Clean any mineral deposits from the stem and inside the faucet body. Apply plumber’s grease to the new washers and O-rings. Insert the new washer, screw it back onto the stem, and reassemble the stem into the faucet body. Tighten the packing nut.
-
- Test: Reinstall the handle. Turn on the water supply slowly and check for leaks.
Specific Parts & Tools for Compression Faucets:
-
- Rubber Washers (various sizes)
-
- O-rings (various sizes)
-
- Stem Packing (if applicable)
-
- Faucet Seat Wrench (if seats need replacement)
Cartridge Faucets: Replacing the Core
Cartridge faucets typically leak when the internal seals or the cartridge itself wears out. Replacing the entire cartridge is usually the most effective fix.
-
- Access the Cartridge: Remove the decorative cap on the handle. Unscrew the handle set screw (often a hex key or Phillips). Pull the handle off.
-
- Remove Retaining Clip/Nut: Locate the retaining clip or nut that holds the cartridge in place. Remove the clip with needle-nose pliers or unscrew the nut with an adjustable wrench.
-
- Remove the Old Cartridge: Pull the cartridge straight up and out of the faucet body. Some stubborn cartridges may require special cartridge pliers or a removal tool provided by the manufacturer.
-
- Inspect and Clean: Look for any rubber O-rings at the base of the old cartridge. If they remain in the faucet body, carefully pry them out. Clean any sediment from the faucet body opening.
-
- Install New Cartridge: Ensure the new cartridge is the correct replacement for your faucet model. Apply plumber’s grease to any O-rings on the new cartridge. Align the cartridge correctly (there’s usually a notch or specific orientation) and push it firmly into place.
-
- Reassemble: Reinstall the retaining clip or nut. Reattach the handle and tighten its set screw.
-
- Test: Turn on the water supply slowly and check for leaks and proper operation.
Specific Parts & Tools for Cartridge Faucets:
-
- Replacement Cartridge (model-specific)
-
- Needle-nose Pliers (for retaining clips)
-
- Cartridge Puller (if needed)
-
- Plumber’s Grease
Ceramic Disc Faucets: Precision Sealing
These are known for their durability, but persistent drips usually indicate damaged ceramic discs or worn inlet/outlet seals.
-
- Disassemble the Handle: Pop off the decorative cap. Unscrew the handle set screw (often hex key) and remove the handle.
-
- Remove Escutcheon & Disc Cylinder: Unscrew the decorative escutcheon or dome that covers the disc cylinder. Lift off the disc cylinder.
-
- Examine and Replace Seals/Discs: Beneath the disc cylinder, you’ll find rubber seals (often three) and possibly the ceramic discs themselves. Carefully lift out the seals and inspect them for wear or damage. Clean the ceramic discs thoroughly. If the discs are chipped or cracked, they will need to be replaced.
-
- Clean and Reassemble: Clean any mineral deposits from the seals, discs, and the faucet body. Apply a thin layer of plumber’s grease to the new seals. Insert the new seals and then the ceramic discs, ensuring they are correctly oriented. Reassemble the disc cylinder, escutcheon, and handle.
-
- Test: Turn on the water supply slowly and check for leaks.
Specific Parts & Tools for Ceramic Disc Faucets:
-
- Ceramic Disc Replacement Kit (model-specific, includes discs and seals)
-
- Plumber’s Grease
Ball Faucets: Springs, Seals, and Swivels
Ball faucets, with their distinctive single handle on top of a spherical cap, can be a bit more intricate due to multiple small parts. Leaks typically stem from worn springs, rubber seals, or O-rings.
-
- Remove the Handle: Use a hex key to loosen the set screw on the side of the handle. Pull the handle off.
-
- Remove the Cap and Collar: Use adjustable pliers or channel locks to unscrew the cap assembly and then the collar that holds the ball in place. Be careful not to scratch the finish; use masking tape to protect the surfaces.
-
- Remove the Ball: Lift out the control ball.
-
- Remove Springs and Seals: Inside the faucet body, you’ll see two rubber seals, each with a small spring underneath. Use a small screwdriver or awl to carefully pry out the old seals and springs. Also, inspect the O-rings around the faucet spout. If the spout leaks at its base, these O-rings are the culprit.
-
- Clean and Replace: Clean any debris from inside the faucet body. Insert the new springs (pointy side down into the valve seats), followed by the new rubber seals. Apply plumber’s grease to all new O-rings, springs, and seals. If replacing spout O-rings, pull the spout straight up and replace them.
-
- Reassemble: Place the control ball back into position (there’s usually a groove to align). Reinstall the collar, tightening it securely but gently. Then screw on the cap and reattach the handle, tightening the set screw.
-
- Test: Turn on the water supply slowly and check for leaks.
Specific Parts & Tools for Ball Faucets:
-
- Ball Faucet Repair Kit (includes springs, seals, O-rings, sometimes the ball)
-
- Hex Key (Allen Wrench)
-
- Plumber’s Grease
Troubleshooting Common Issues After Repairing Your Kitchen Faucet
Even after a meticulous repair, sometimes issues can persist. Here’s how to troubleshoot them.
Persistent Drips
-
- Incorrect Part: Double-check that all replacement parts (washers, O-rings, cartridges) are the exact match for your faucet model. Even slight variations can cause leaks.
-
- Improper Seating: Ensure all components are seated correctly. A washer might be skewed, or a cartridge not fully pushed into place.
-
- Damaged Valve Seat: For compression faucets, the valve seat itself (the surface the washer presses against) might be pitted or corroded. These can often be replaced using a faucet seat wrench or resurfaced with a seat grinding tool.
-
- Mineral Deposits: Thoroughly clean any mineral deposits from inside the faucet body, especially where seals make contact.
Leaks at Connections
-
- Supply Line Connections: If water leaks from where the supply lines connect to the faucet or the shut-off valves, ensure the connections are tight. You may need to replace the supply lines if the rubber washers inside their nuts are compromised.
-
- Threaded Connections: For any threaded connections (like packing nuts), ensure they are tightened properly. Applying plumber’s tape (PTFE tape) to the threads before tightening can create a better seal.
Low Water Pressure
-
- Aerator Clog: The most common cause. Unscrew the aerator at the tip of the spout and clean any trapped debris or mineral deposits.
-
- Partially Closed Shut-Off Valve: Ensure both hot and cold shut-off valves under the sink are fully open.
-
- Cartridge/Ball Issues: If a new cartridge or ball isn’t installed correctly, it can restrict water flow. Double-check its orientation and seating.
Conclusion
Repairing a dripping kitchen faucet is more than just stopping an annoying drip; it’s an investment in your home’s efficiency, a reduction in water waste, and a testament to your growing DIY skills. By understanding your faucet type, gathering the right tools, and following these step-by-step instructions, you can confidently tackle this common household repair. The satisfaction of a job well done, combined with the savings on your water bill and potential plumber fees, makes this a truly rewarding endeavor. So, take the plunge, silence that drip, and enjoy the peace of mind that comes with a perfectly functioning kitchen faucet.
Ready to tackle your next home improvement project? Explore more of our expert guides to empower your DIY journey!
FAQs About Repairing a Dripping Kitchen Faucet
- Q: How do I know what type of faucet I have?
- A: The easiest way is often by the number of handles and the age of the faucet. Two-handle faucets are typically compression or cartridge. Single-handle faucets are usually cartridge, ceramic disc, or ball. Consulting your faucet’s brand and model number (often found on the underside) is the most reliable method.
- Q: Can I use universal replacement parts?
- A: While some parts like O-rings and standard washers can be universal, specific components like cartridges, ceramic discs, and ball faucet repair kits are usually brand and model-specific. It’s always best to get the exact part for your faucet to ensure a proper fit and long-lasting repair.
- Q: What should I do if my faucet still drips after replacing the washer/cartridge?
- A: Re-check your work. Ensure all parts are correctly seated, and screws are tightened appropriately. For compression faucets, the valve seat might be corroded and need replacement or resurfacing. For cartridge faucets, the new cartridge might be faulty, or there could be a crack in the faucet body itself (though this is rare).
- Q: How long does it typically take to fix a dripping kitchen faucet?
- A: For a first-timer, expect anywhere from 30 minutes to 2 hours, depending on the faucet type and how easily parts can be removed. With experience, many repairs can be completed in under 30 minutes.
- Q: Is plumber’s grease really necessary?
- A: Yes, plumber’s grease (silicone-based) is highly recommended. It lubricates O-rings and seals, allowing for smoother operation and preventing premature wear, which extends the life of your repair and prevents future drips.